How to Propagate Snake Plant: 3 Easy Methods
If you have ever admired a friend's lush snake plant collection and wondered how they ended up with so many, the answer is almost always propagation. Learning how to propagate snake plant — or Sansevieria trifasciata, now reclassified as Dracaena trifasciata — is one of the most rewarding skills a plant parent can pick up. These architectural, air-purifying plants are famously forgiving, and they respond well to being multiplied through three distinct methods: water propagation, soil propagation, and division. Whether you want to fill your own shelves or share cuttings with fellow plant lovers, this guide walks you through every step.

Choosing the Right Propagation Method
Before you reach for the scissors, it helps to understand what each method offers — and what it costs you. The three approaches differ in speed, difficulty, and one critically important factor: variegation retention.
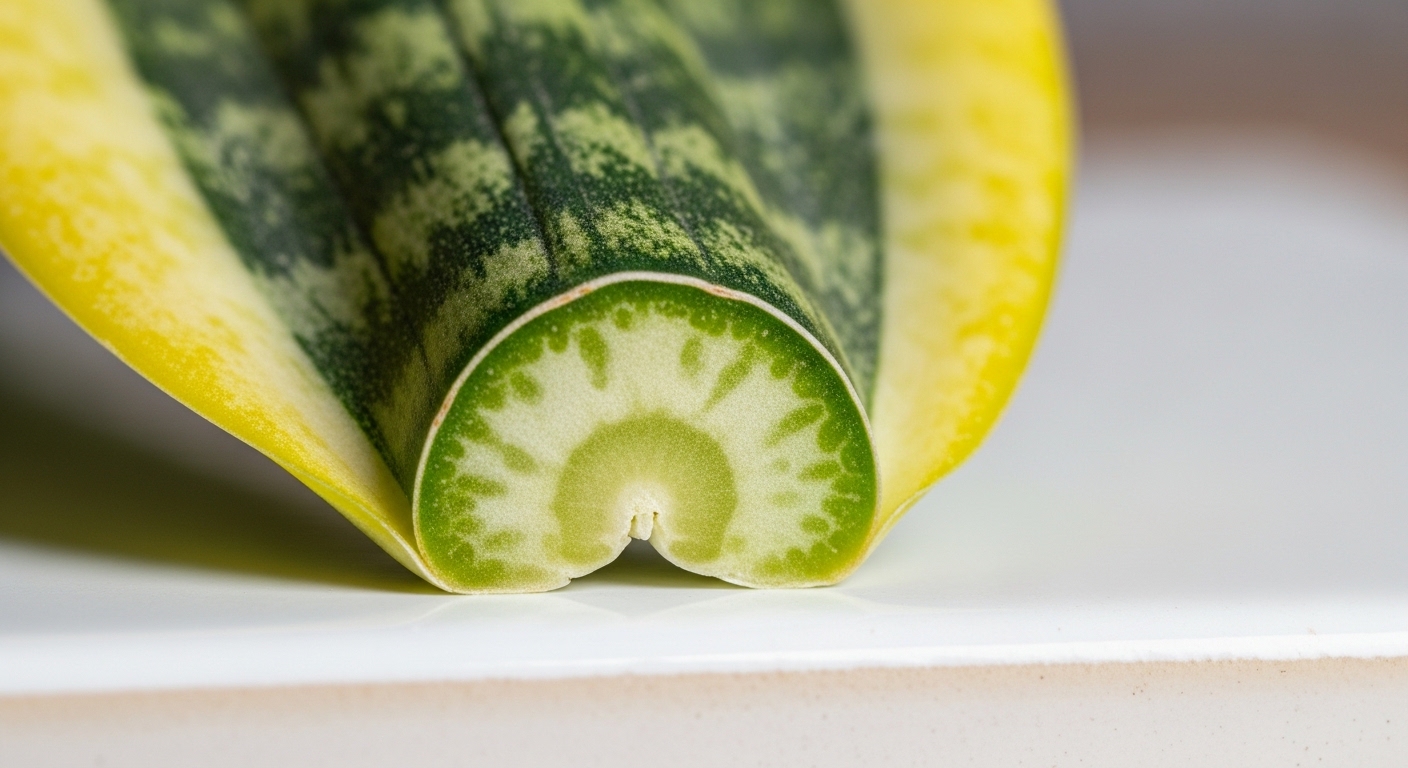
Snake plants with yellow or white leaf margins — like the popular Sansevieria trifasciata 'Laurentii' — are variegated cultivars. This variegation is a chimeric trait, meaning it exists only in specific cell layers of the plant. Leaf cuttings in water or soil will generally produce offspring that revert to the plain green form, losing those beautiful golden edges. Division is the only method that reliably preserves variegation in the new plant.
Here is a quick overview to help you decide:
- Water propagation: Beginner-friendly, visually satisfying, slower to root — best for solid green varieties.
- Soil propagation: Produces stronger roots from the start, slightly faster to establish — best for solid green varieties.
- Division: The only method that preserves variegation; requires a mature, multi-stemmed plant.
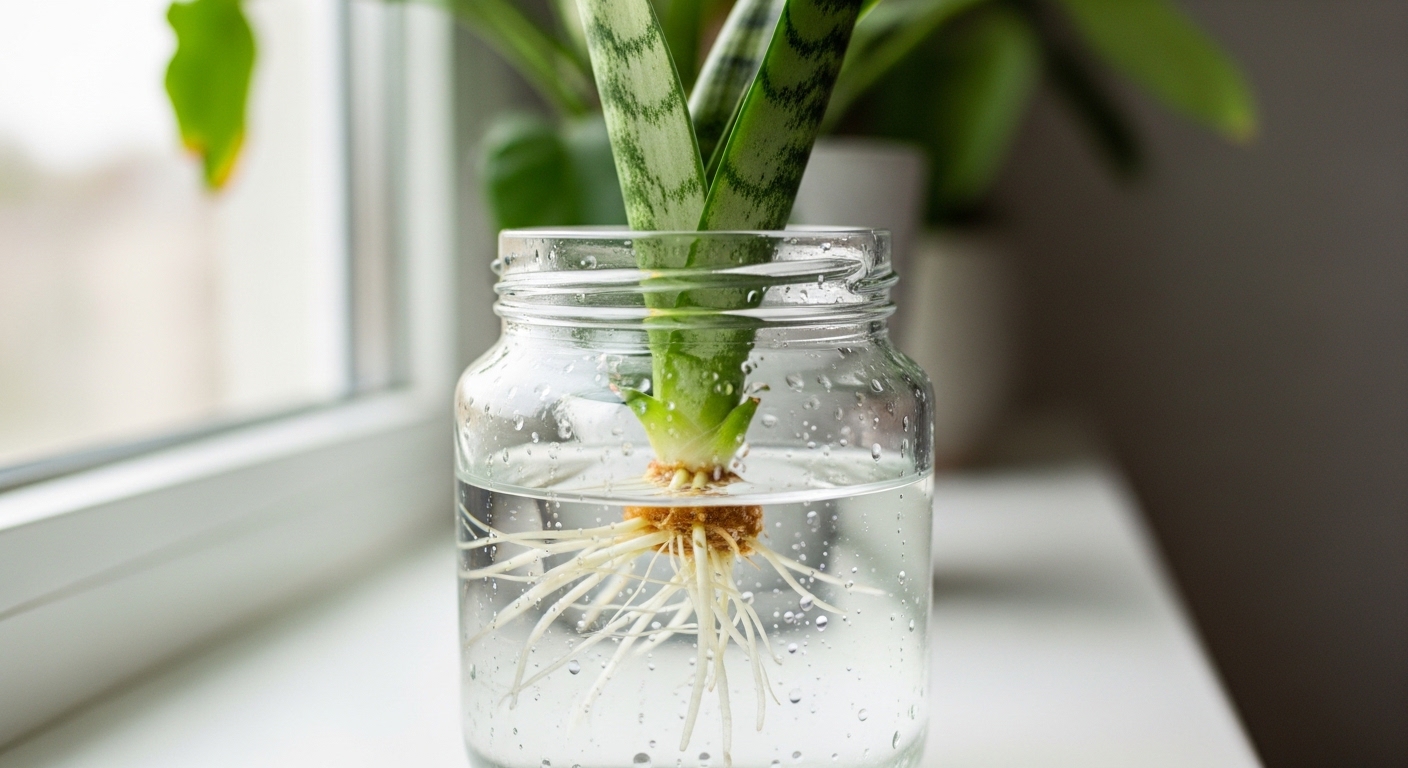
Step-by-Step: Water Propagation
Water propagation is the most visually engaging method — you can watch roots emerge in real time, which makes it especially satisfying for beginners. It works best on healthy, firm leaves from a solid green snake plant.
What you will need:
- A healthy snake plant leaf (at least 10 cm long)
- Clean, sharp scissors or a knife
- A clean glass jar or vase
- Room-temperature water (filtered or left to sit overnight to off-gas chlorine)
Steps:
- Cut a healthy leaf close to the base of the plant using a clean, sharp blade. A clean cut reduces the risk of bacterial rot.
- Allow the cut end to callus for 1–2 hours in open air before placing it in water. This brief drying period can help reduce the chance of rot at the cut site.
- Place the cutting cut-side down in a jar with about 3–5 cm of water, ensuring the leaf base is submerged but the rest of the leaf stays dry.
- Position the jar in a spot with bright, indirect light. Avoid direct sun, which can overheat the water and encourage algae growth.
- Change the water every 5–7 days to keep it fresh and oxygenated.
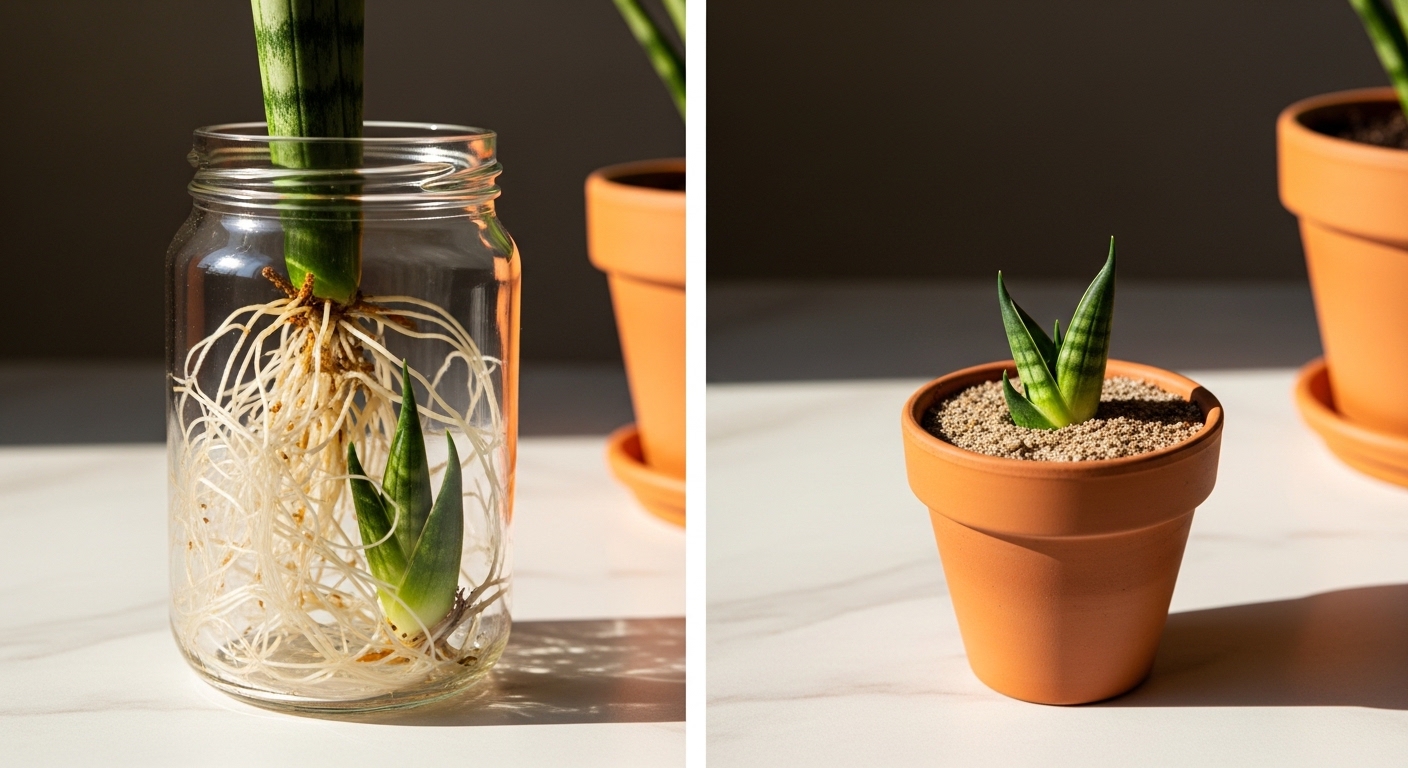
- Expect to see small white roots emerging from the cut end within 3–6 weeks, depending on temperature and light conditions.
Many growers find that scoring the bottom of the cutting with a shallow horizontal notch — a technique sometimes called "notching" — can encourage faster root emergence by exposing more of the vascular tissue to water.
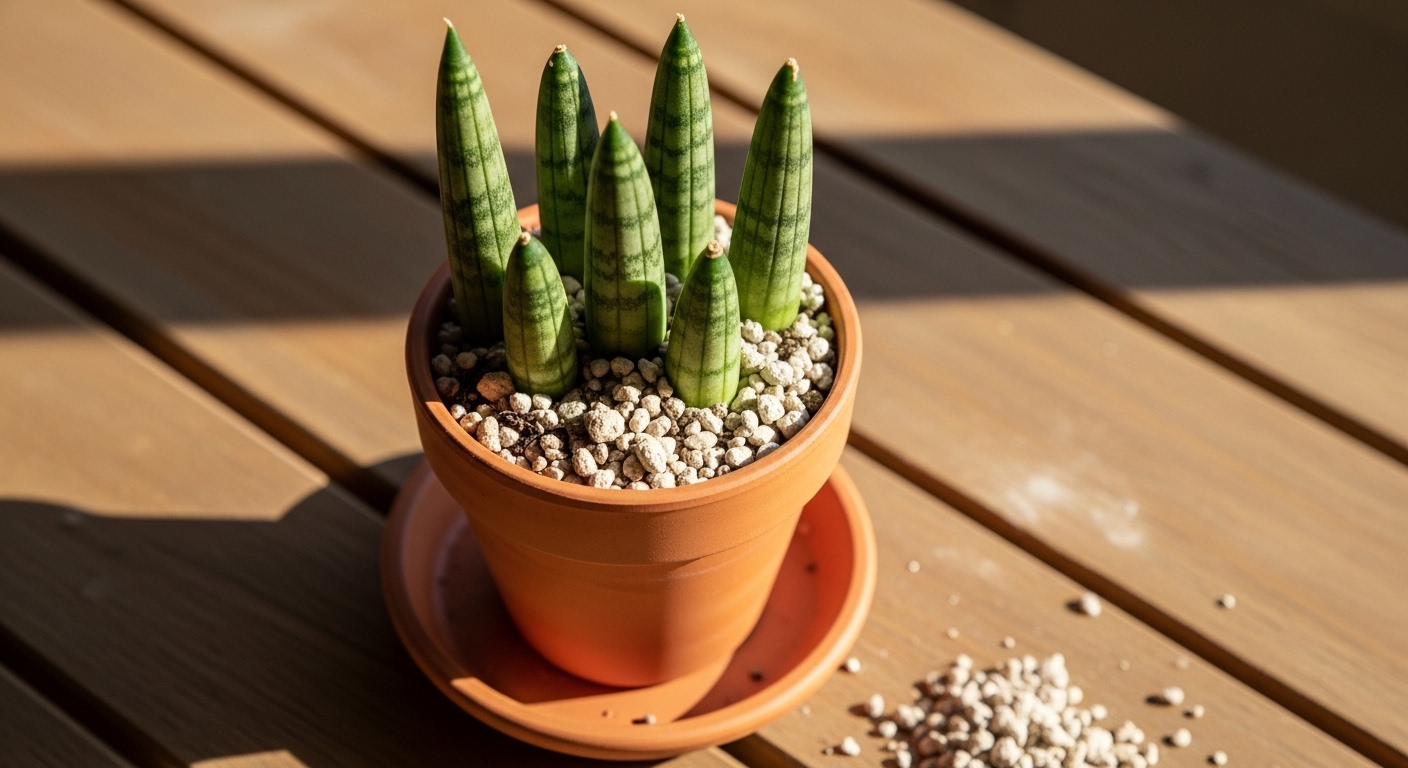
Step-by-Step: Soil Propagation
Propagating snake plant cuttings directly in soil skips the water-to-soil transition step, which means the roots that develop are already adapted to a solid growing medium. Many growers find this produces sturdier plantlets in the long run, though you will need a little more patience before you can see visible progress.
What you will need:
- A healthy snake plant leaf cutting (10–15 cm sections work well)
- A well-draining propagation mix — a blend of perlite and cactus soil, or pure coarse perlite, tends to work well
- A small pot with drainage holes
- Optional: rooting hormone powder or gel
Steps:
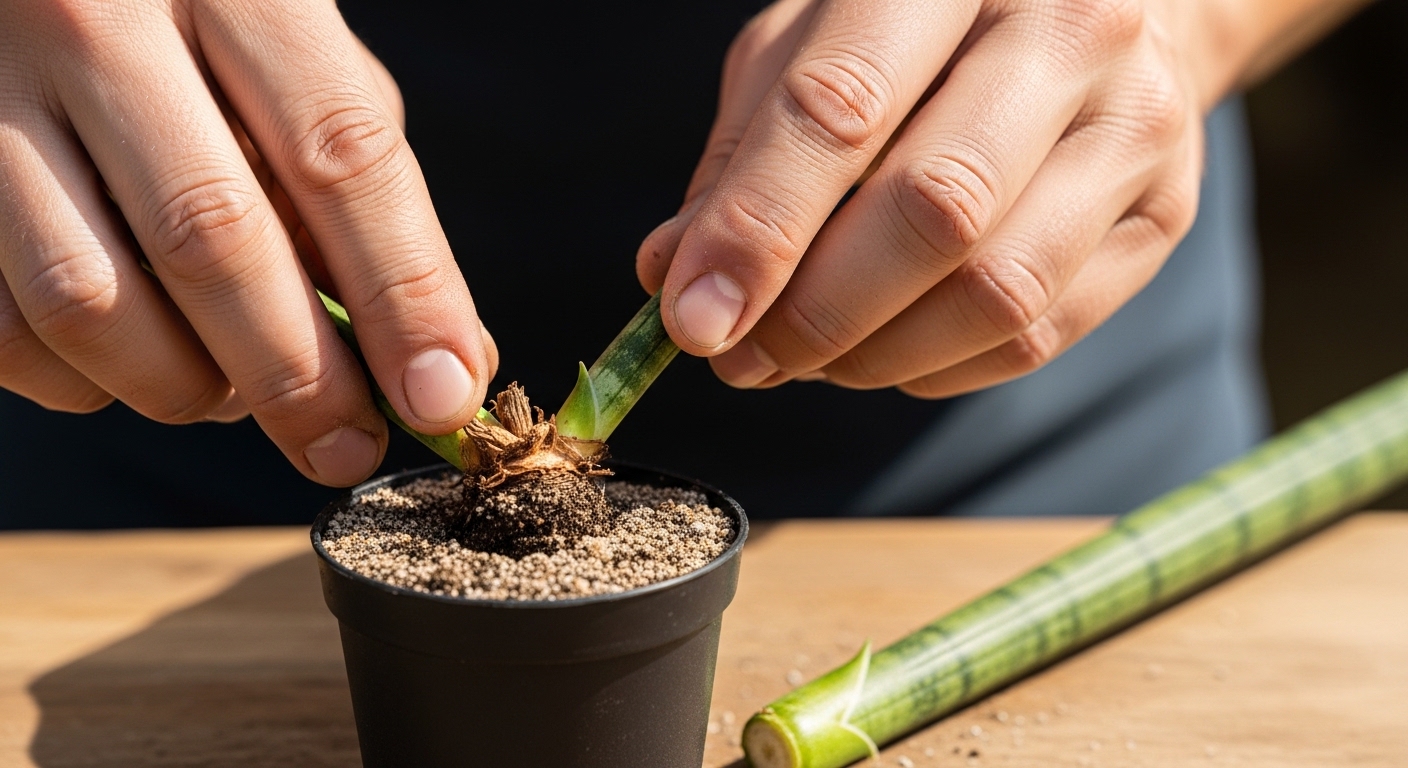
- Cut a healthy leaf into sections of roughly 8–10 cm each. If you are cutting a long leaf into multiple sections, mark the bottom of each piece with a small notch — snake plant cuttings must be planted the right way up or they will not root.
- Allow cut sections to callus for 24–48 hours in a warm, dry spot out of direct sun.
- Optionally, dip the bottom 1 cm of each cutting into rooting hormone to encourage faster root development.
- Insert each cutting about 2–3 cm deep into lightly moistened propagation mix, bottom-end down.
- Place the pot in a warm location (ideally 18–27°C) with bright, indirect light.
- Water sparingly — only when the top 2 cm of the mix feels completely dry. Overwatering at this stage is the most common cause of failure.
- Gently tug the cutting after 4–6 weeks. Resistance indicates roots are forming.
Rooting Timeline and What to Expect
One of the most common frustrations with snake plant propagation is the waiting. These plants are slow growers by nature, and their cuttings follow the same unhurried pace. Understanding the typical timeline can help you stay patient and avoid the urge to disturb your cuttings too soon.
Here is a general rooting timeline for each method:
- Water propagation: Roots typically appear within 3–6 weeks. Small pups (new plantlets) may begin to emerge from the base after 2–3 months.
- Soil propagation: Root development is not visible, but gentle resistance when tugging after 4–8 weeks suggests roots are present. Pups may appear above the soil surface after 2–4 months.
- Division: Divided pups with intact roots establish quickly — expect new leaf growth within 4–8 weeks of potting up.
Temperature plays a significant role in rooting speed. Cuttings kept in a consistently warm environment (around 21–27°C) tend to root noticeably faster than those in cooler rooms. Avoid placing cuttings near cold drafts or air conditioning vents during this period.
Common Propagation Mistakes
Even with a plant as resilient as the snake plant, a few missteps can slow your progress or cause cuttings to fail entirely. Recognizing these pitfalls early makes all the difference.
- Planting cuttings upside down. Snake plant cuttings are polarity-sensitive — they will only root from the end that was originally closest to the soil. Always mark the bottom of each cutting before you start.
- Overwatering soil cuttings. The propagation mix should be barely moist, not wet. Soggy soil is the leading cause of rot in snake plant cuttings.
- Expecting variegation from leaf cuttings. As noted earlier, leaf cuttings from variegated cultivars will almost always revert to solid green. If preserving the yellow margins matters to you, division is the only reliable path.
- Using unhealthy or old leaves. Cuttings taken from damaged, yellowing, or very old leaves tend to rot rather than root. Choose firm, healthy, mature leaves from the outer ring of the plant.
- Too little light. Cuttings placed in dim corners may survive but will root very slowly. Bright, indirect light supports active cellular growth and speeds up the process.
Mushy, brown cutting base? This is almost always rot caused by excess moisture. Remove the affected section, allow the cutting to dry out for 24 hours, and restart in fresh, dry propagation mix.
Potting Up Your New Snake Plant
Once your cutting has developed a healthy root system — generally roots that are at least 2–3 cm long for water-propagated cuttings, or firm resistance when gently tugged for soil-propagated ones — it is ready to be potted into its permanent home.
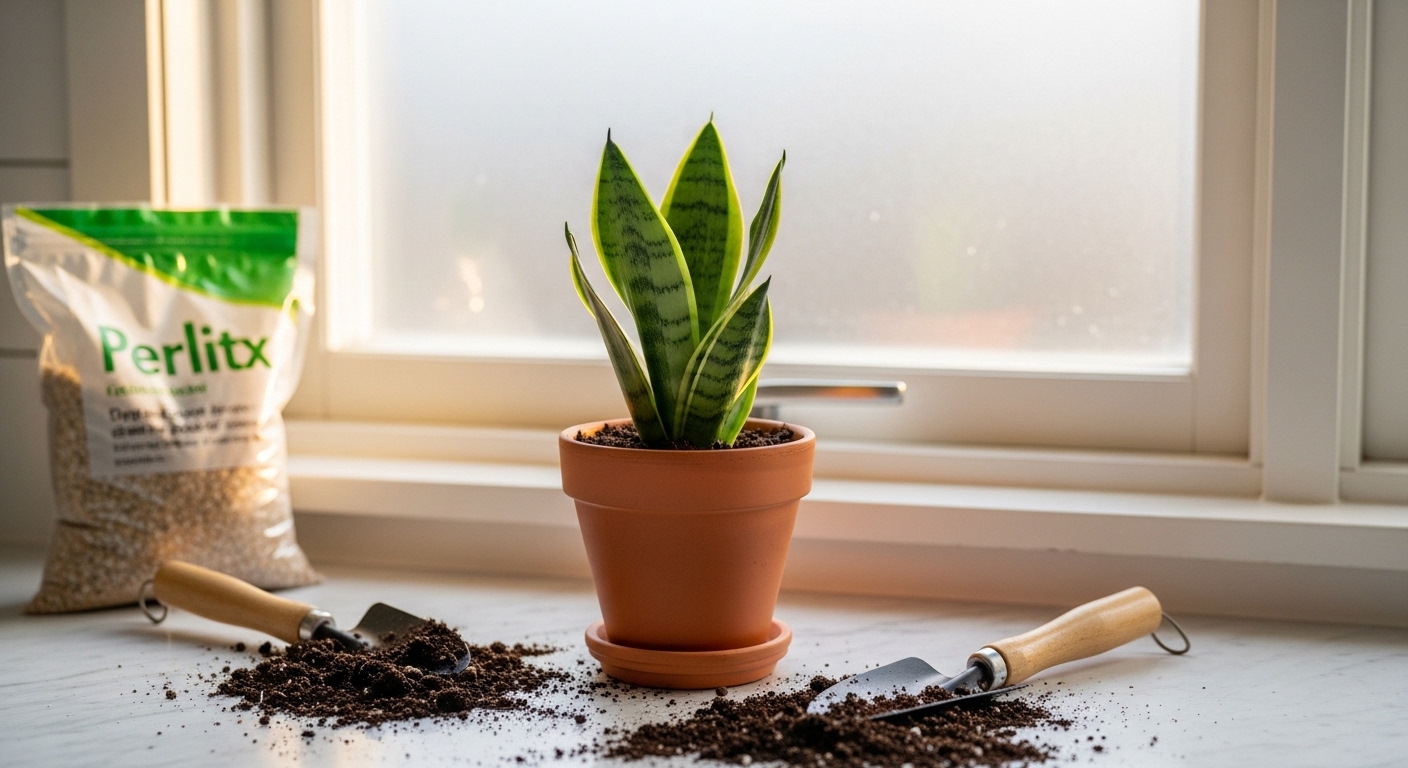
Choose a pot only slightly larger than the root ball. Snake plants generally prefer to be slightly root-bound, and an oversized pot holds excess moisture that can lead to root rot. A terracotta pot is an excellent choice because its porous walls allow the soil to dry more evenly between waterings.
The ideal potting mix for established snake plants is well-draining and gritty. A reliable blend many growers use is:
- 60% quality potting soil
- 30% perlite or coarse sand
- 10% orchid bark for added aeration
After potting, water lightly and place your new plant in bright, indirect light. Hold off on fertilizing for the first 4–6 weeks to allow the roots to settle without the stress of added nutrients. From here, your new snake plant will grow steadily — slowly but surely, just as it always has.
There is something genuinely satisfying about watching a single leaf cutting transform into a thriving new plant over the course of a few months. Snake plant propagation rewards patience, and the process teaches you to read your plant's signals — from the first tiny root tip appearing in a glass jar to the moment a new pup pushes up through the soil. Whether you are growing your collection, gifting plants to friends, or simply experimenting with a new skill, these three methods give you everything you need to multiply your Sansevieria with confidence.


Comments
Post a Comment