How to Start Plants from Seed Indoors: Beginner Guide
Starting plants from seed indoors is one of those skills that quietly changes how you garden. You get earlier harvests, access to varieties you'd never find at a nursery, and a real sense of where your plants come from. But the first attempt can feel overwhelming — seed trays, germination mix, humidity domes, heat mats, grow lights. Where do you even begin?
The good news: the biology is forgiving. Seeds want to germinate. Your job is mostly about creating the right conditions and staying consistent. This guide walks you through every step, from choosing your setup to moving seedlings outdoors for the first time.
Choosing the Right Propagation Method
For indoor seed starting, the core method is direct sowing into a controlled germination environment — seed trays or cell packs filled with a dedicated germination mix, kept warm and moist until sprouts emerge. This is different from direct outdoor sowing, where you rely on natural soil temperature and rainfall.
Most vegetables, herbs, and annual flowers do well started this way. A few crops — carrots, beets, poppies — generally dislike transplanting and are better sown directly outdoors. For everything else, indoor starting gives you a meaningful head start, often four to eight weeks before your last frost date.
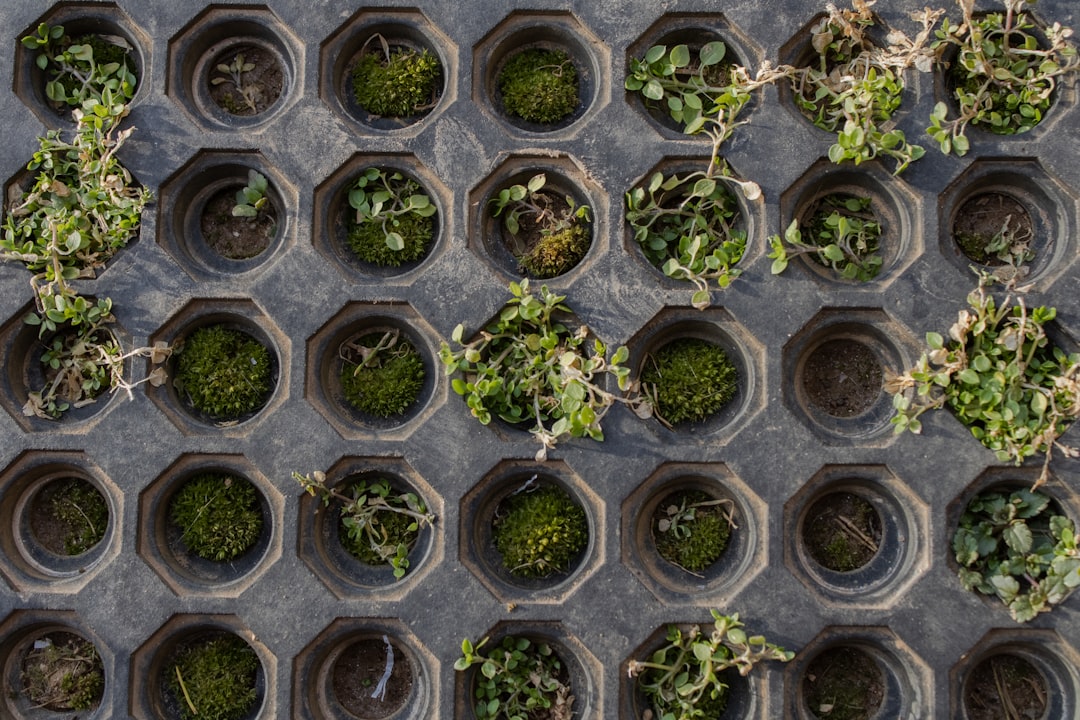
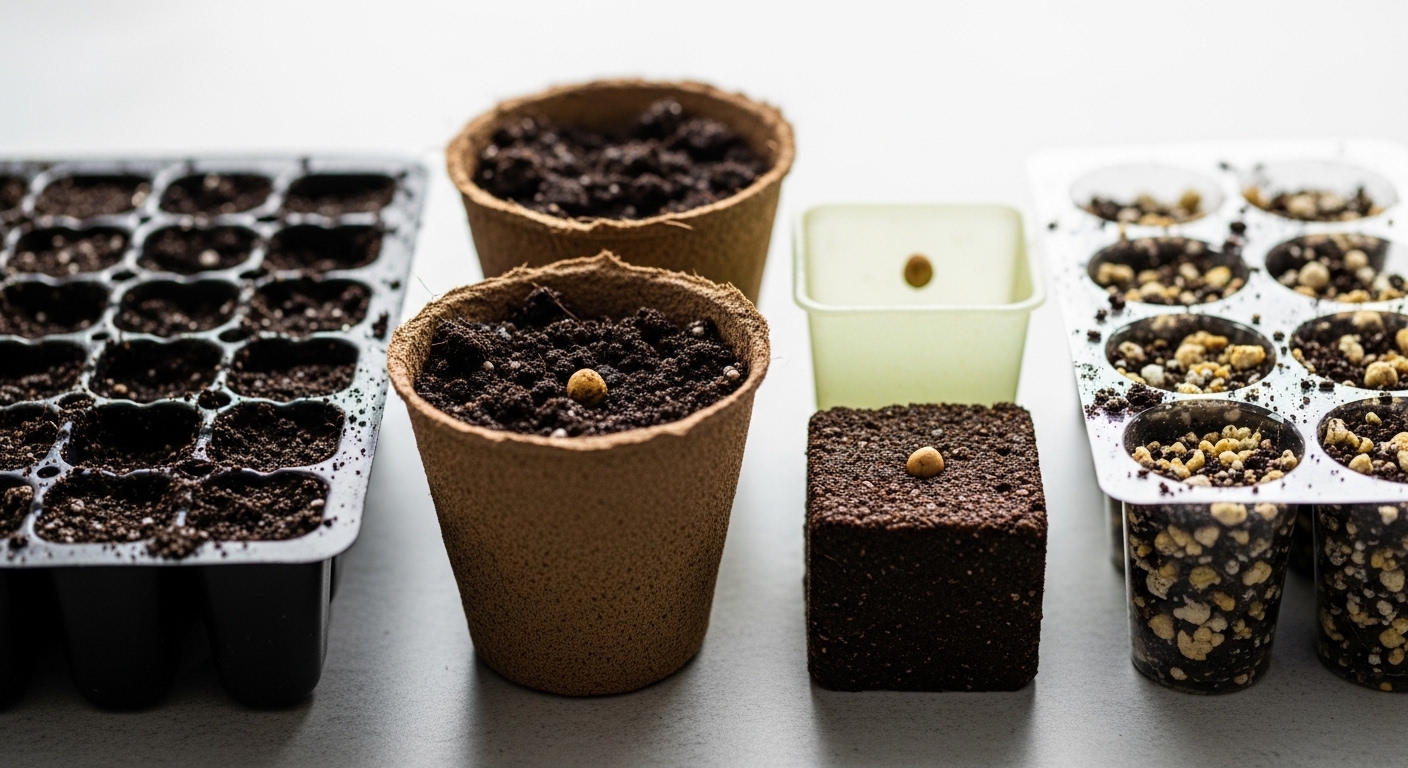
The materials you choose matter more than most beginners expect. Seed trays come in several formats:
- 72-cell or 128-cell plug trays — ideal for small seeds like tomatoes, peppers, and herbs; efficient use of space
- 4-cell or 6-cell packs — better for larger seeds like squash or cucumbers that need more root room early on
- Soil blocks — a soil-only alternative to plastic trays; many growers find they reduce transplant shock since roots aren't disturbed
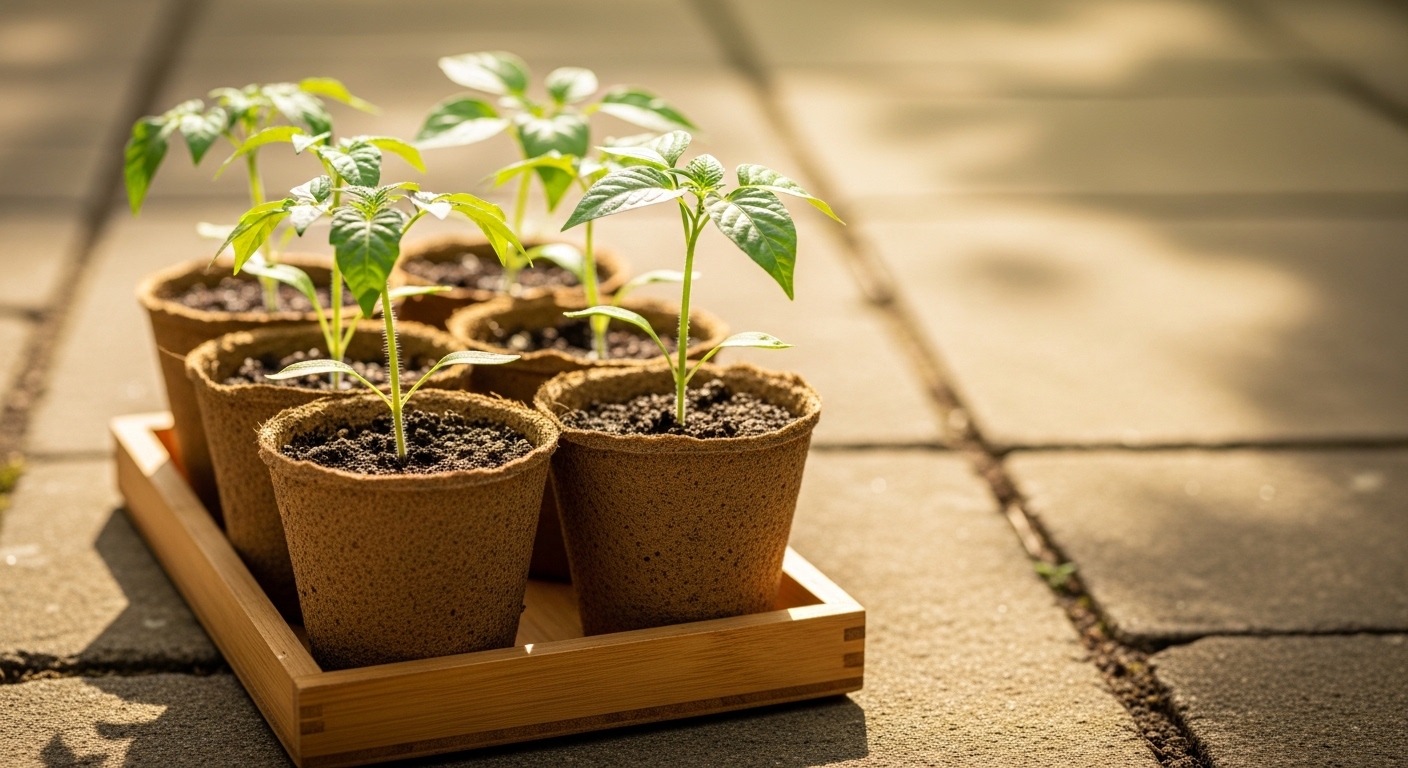
- Biodegradable peat or coir pots — plant the whole pot; useful for crops sensitive to root disturbance
Reusable plastic trays are practical and cost-effective. If you reuse them season to season, rinse them with a diluted white vinegar solution between uses to reduce the risk of disease carryover.
Step-by-Step: Setting Up Your Germination Environment
Successful germination comes down to three things: consistent warmth, steady moisture, and darkness (for most seeds). Get these right and germination rates tend to be high. Skip one and you'll often see patchy, slow, or failed sprouting.
Fill your trays. Use a dedicated seed-starting or germination mix — not standard potting soil. Germination mixes are finer, lower in nutrients, and better at holding moisture without compacting. Many are peat- or coir-based with added perlite for drainage. Fill cells to just below the rim and gently firm the surface.
Sow at the right depth. A general rule: sow seeds at a depth of roughly twice their diameter. Tiny seeds like basil or snapdragon can be pressed lightly onto the surface and barely covered. Larger seeds like squash or nasturtium go about 1–2 cm deep. Check your seed packet — depth guidance is usually printed there.
Water carefully before covering. Mist the surface thoroughly with a spray bottle until the mix is evenly moist but not waterlogged. You want the mix to feel like a wrung-out sponge — damp throughout, with no pooling water at the base.
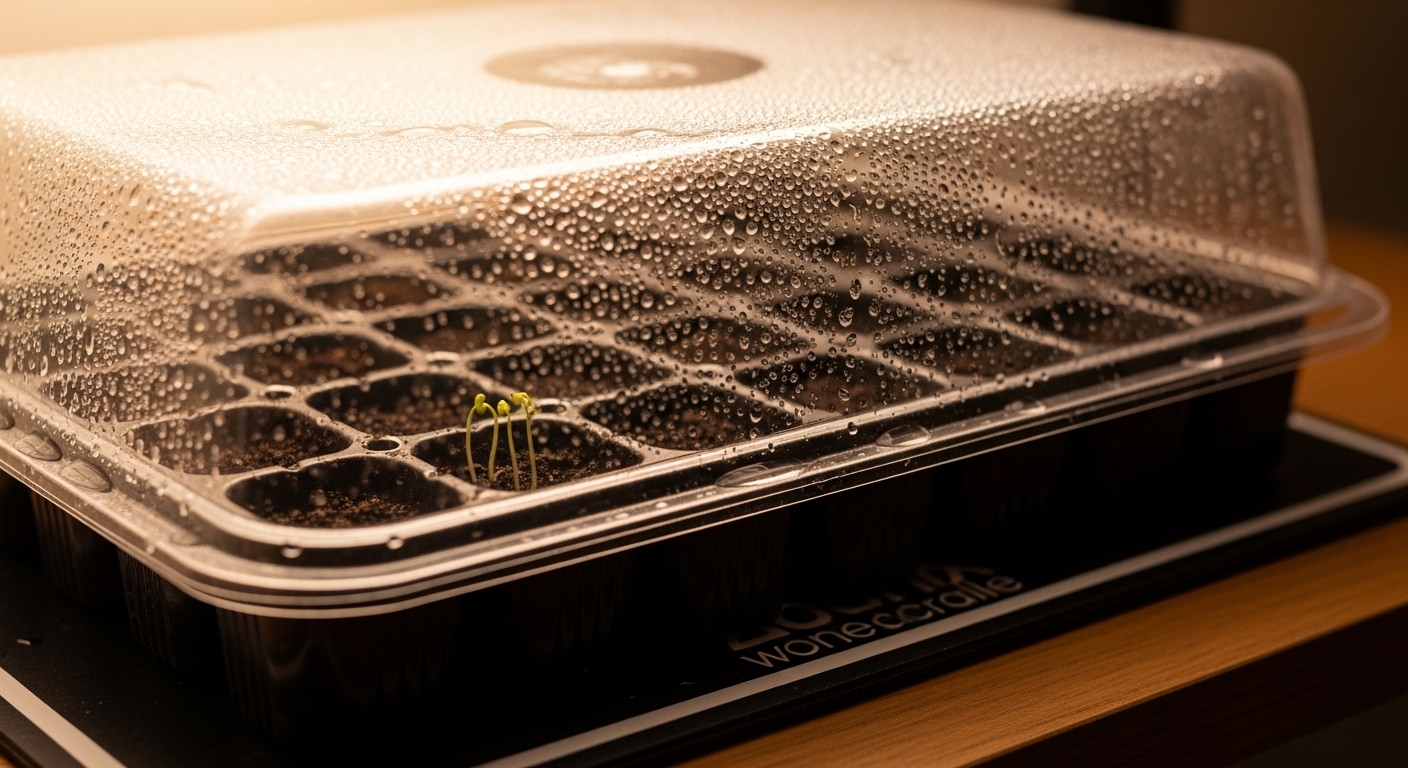
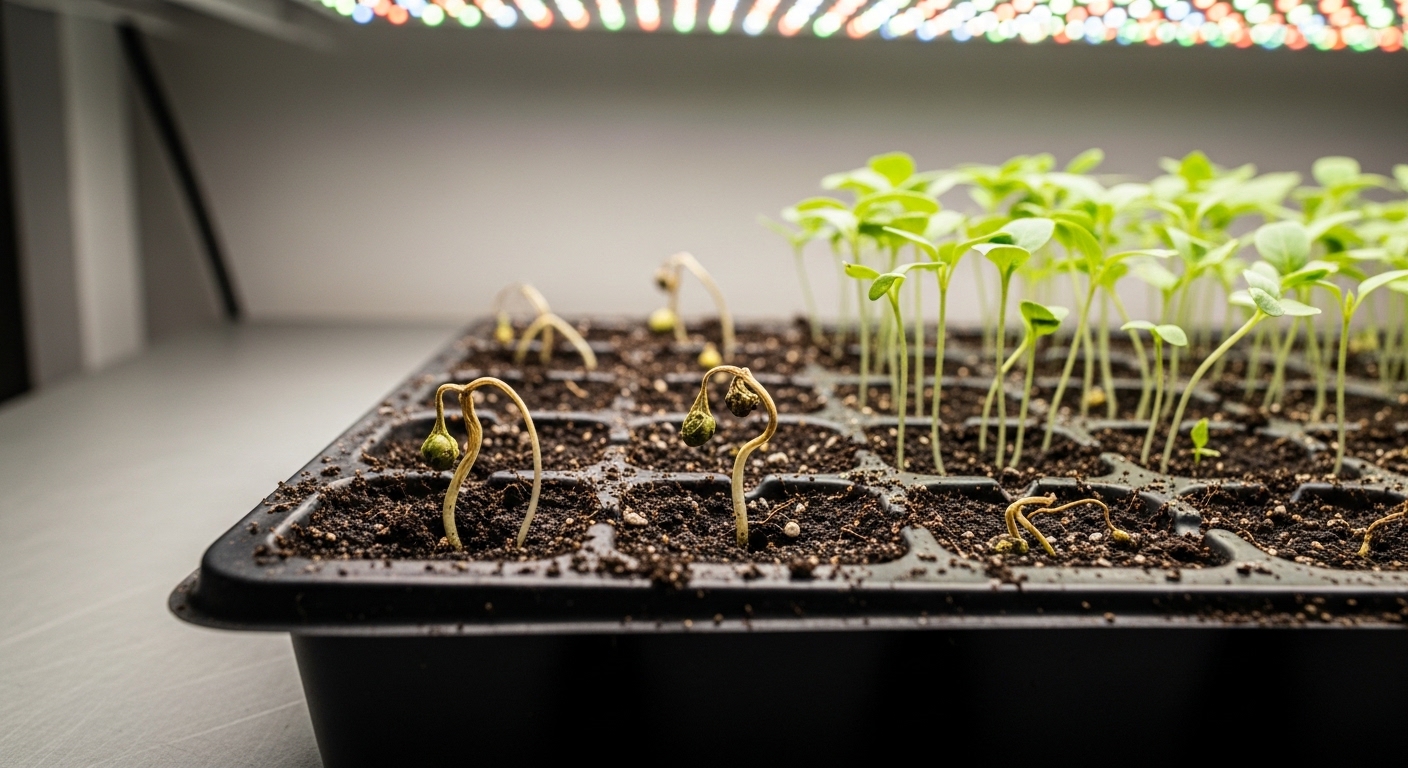
Use a humidity dome. A clear plastic dome placed over the tray creates a mini greenhouse effect, trapping moisture and reducing the need to water during germination. Most seeds germinate well at 65–75% relative humidity. Check under the dome daily — if condensation is heavy and dripping, prop one corner open slightly for airflow.
Add bottom heat. Many common crops — tomatoes, peppers, eggplant, basil — germinate significantly faster with soil temperatures between 21–27°C (70–80°F). A seedling heat mat placed under the tray can help maintain this range. It's worth noting that heat mats raise soil temperature, not air temperature, so the effect is targeted and efficient. Follow manufacturer instructions and consult a licensed electrician if you're setting up a larger heated propagation bench.
Most seeds don't need light to germinate — they need warmth and moisture. Once the first sprout breaks the surface, light becomes the priority. Move trays to your light source the moment you see the first seedling emerge.
Step-by-Step: Grow Light Setup for Seedlings
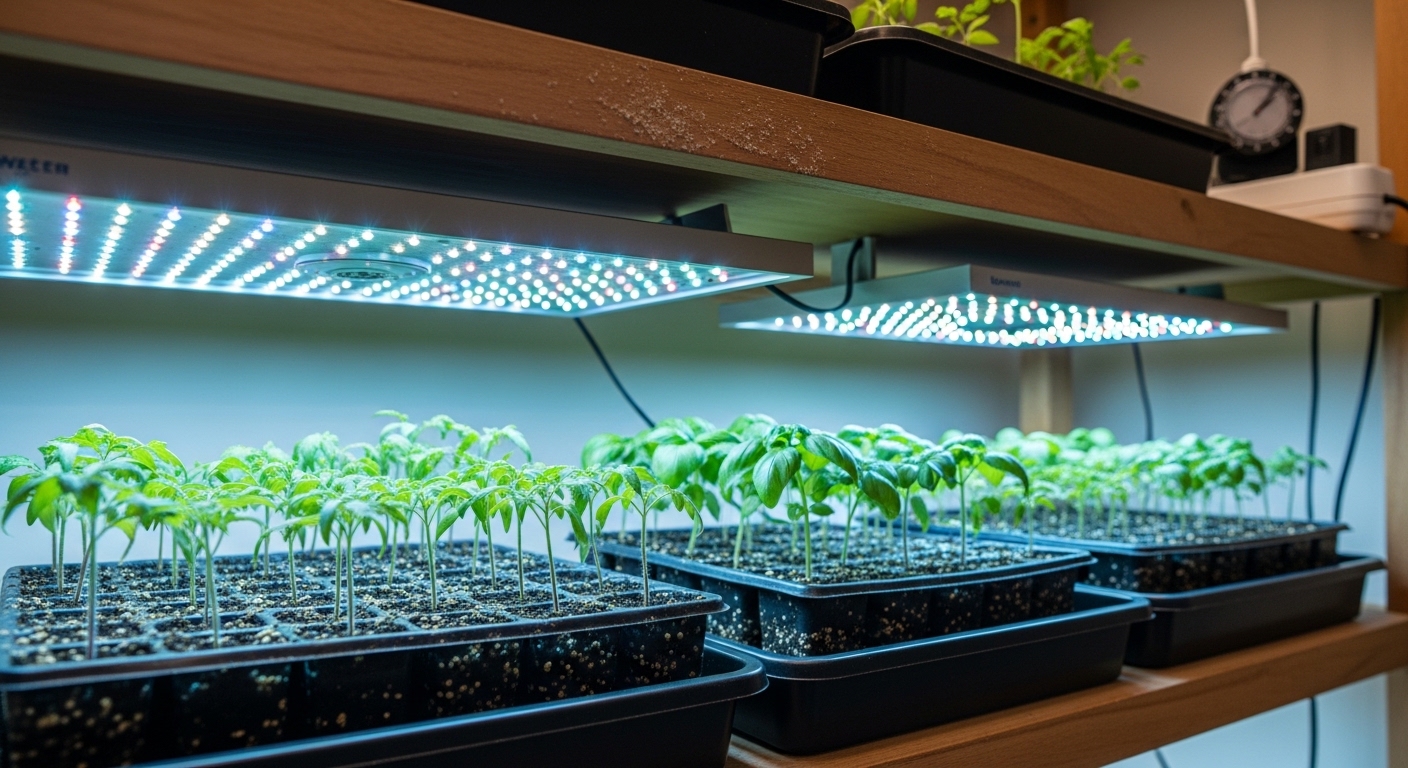
Once seeds sprout, light is the single most important factor in raising strong seedlings. A south-facing windowsill can work in some climates, but in most cases — especially in late winter or early spring — natural light alone tends to produce leggy, stretched seedlings that struggle later. A dedicated grow light changes the outcome dramatically.
For seedlings, a full-spectrum LED grow light in the 5000–6500K color temperature range generally works well. This cooler spectrum supports compact, leafy growth. You don't need an elaborate setup — a simple two-bulb T5 fluorescent or a single LED panel suspended above a shelf is enough for a standard home seed-starting operation.
Distance matters. Most seedling grow lights work best positioned 5–10 cm above the tops of the seedlings. As plants grow, raise the light to maintain that distance. Too far away and seedlings stretch toward the source; too close and leaf tips may show bleaching or heat stress.
Duration matters too. Seedlings generally do well with 14–16 hours of light per day. A simple plug-in timer takes the guesswork out of this completely. Many growers find that giving plants 8 hours of darkness is just as important as the light period — it supports natural metabolic rhythms.
Watch the seedlings themselves. Compact internodes (the stem sections between leaves) and upright posture are signs the light is adequate. Pale color and elongated stems are the first sign that something needs adjusting.
Rooting Timeline & What to Expect
Germination timelines vary widely by species, but here's a general framework most beginners can work with:
- Fast germinators (3–7 days): radishes, lettuce, basil, cucumber, squash
- Medium germinators (7–14 days): tomatoes, peppers (at the faster end with heat), brassicas, marigolds
- Slow germinators (14–21+ days): peppers (without heat), parsley, celery, some perennial flowers
One frustrating part of early seed starting is the waiting. Pepper seeds, in particular, can take three weeks or more even under good conditions. Resist the urge to dig into the mix to check — disturbing the soil can damage germinating seeds before they've broken the surface.
After germination, the seedling passes through two key stages. First, the cotyledons (seed leaves) emerge — these are the rounded, often simple-looking first leaves. Then the true leaves appear, which look like the plant's actual foliage. Once you see the first set of true leaves, the seedling is ready to be thinned (one plant per cell) and can begin receiving a very diluted liquid fertilizer — roughly a quarter of the recommended dose.
Many growers notice that seedlings grown with bottom heat germinate unevenly at first — a few cells sprout days before others. This is normal. Keep the dome on until the majority have emerged.

Common Propagation Mistakes
- Sowing too early. Starting seeds 10–12 weeks before your last frost sounds ambitious, but most seedlings become root-bound and stressed if they sit indoors too long. Check the recommended indoor start time on each seed packet — it's usually 4–8 weeks before transplant date.
- Using regular potting mix. Standard potting soil is too coarse, often too nutrient-rich, and can compact in small cells, restricting root development. Always use a fine-textured, low-nutrient germination or seed-starting mix.
- Overwatering after germination. Once the dome comes off and seedlings are under lights, the biggest risk shifts from drying out to staying too wet. Water when the top 1–2 cm of mix feels dry to the touch. Bottom watering — setting the tray in a shallow dish of water and letting the mix absorb from below — can help prevent overwatering and reduce damping off risk.
- Skipping thinning. Two seedlings in one cell compete for water, light, and nutrients. Thin to one plant per cell by snipping the weaker seedling at soil level with small scissors — don't pull, as this can disturb the roots of the one you're keeping.
- Skipping the hardening-off process entirely. Moving seedlings directly from a sheltered indoor environment to full outdoor exposure is one of the most common reasons transplants fail. The transition needs to be gradual — more on this below.
Potting Up Your New Plant
Hardening off is the process of gradually acclimatizing indoor-grown seedlings to outdoor conditions — sun intensity, wind, temperature fluctuation, and lower humidity. Skipping or rushing this step is the most common reason healthy-looking seedlings wilt, bleach, or collapse after transplanting.
The process generally takes 7–14 days and follows a simple progression:
- Days 1–3: Place seedlings outdoors in a sheltered, shaded spot for 1–2 hours in the morning. Bring them back inside before temperatures drop or wind picks up.
- Days 4–6: Extend outdoor time to 3–4 hours. Introduce brief periods of gentle, indirect sun — morning light is ideal at this stage.
- Days 7–10: Move to a spot with 4–6 hours of sun. Leave outdoors for most of the day, bringing in at night if temperatures are still cool.
- Days 11–14: Seedlings can now tolerate full outdoor conditions for most of the day. Transplant into the garden or final containers when overnight temperatures are consistently safe for that species.
Watch for signs of stress during hardening off: bleached or papery patches on leaves indicate sunscald; wilting in the afternoon that doesn't recover by evening suggests the transition is moving too fast. Both are signals to dial back sun exposure for a day or two before continuing.
Once transplanted, water in well and consider a light shade cloth for the first few days if the weather is particularly bright or warm. After that, your seedlings are on their own — and they're usually more resilient than they look.
There's something quietly satisfying about watching a plant you grew from a single seed go into the ground. The whole process — from filling a tray to transplanting a sturdy seedling — takes patience, but it's mostly just showing up and paying attention. Start with two or three easy crops like tomatoes, basil, or lettuce, and build from there. If you're also navigating the challenge of limited indoor space for your setup, exploring vertical shelving and compact grow light rigs is worth looking into next.


Comments
Post a Comment