Philodendron Propagation: Cuttings & Division Guide
Philodendrons are generous plants. Given a little patience and the right technique, a single stem cutting can become a whole new plant — and then another, and another. Whether you're working with a heartleaf philodendron trailing from a shelf or a split-leaf variety reaching across a corner, propagation is genuinely one of the more rewarding things you can do as a plant owner. The process isn't complicated, but there are a few details that make the difference between a cutting that roots in three weeks and one that just sits there, slowly declining. This guide covers stem cuttings, node identification, water versus sphagnum moss rooting, and what to do when things move slowly.
Choosing the Right Propagation Method
For philodendrons, stem cuttings are the most accessible and reliable method for home growers. Division is also possible — particularly for clumping varieties — but cuttings work across nearly every philodendron species you're likely to encounter. The real decision comes down to your rooting medium: water, sphagnum moss, or a light soil mix.
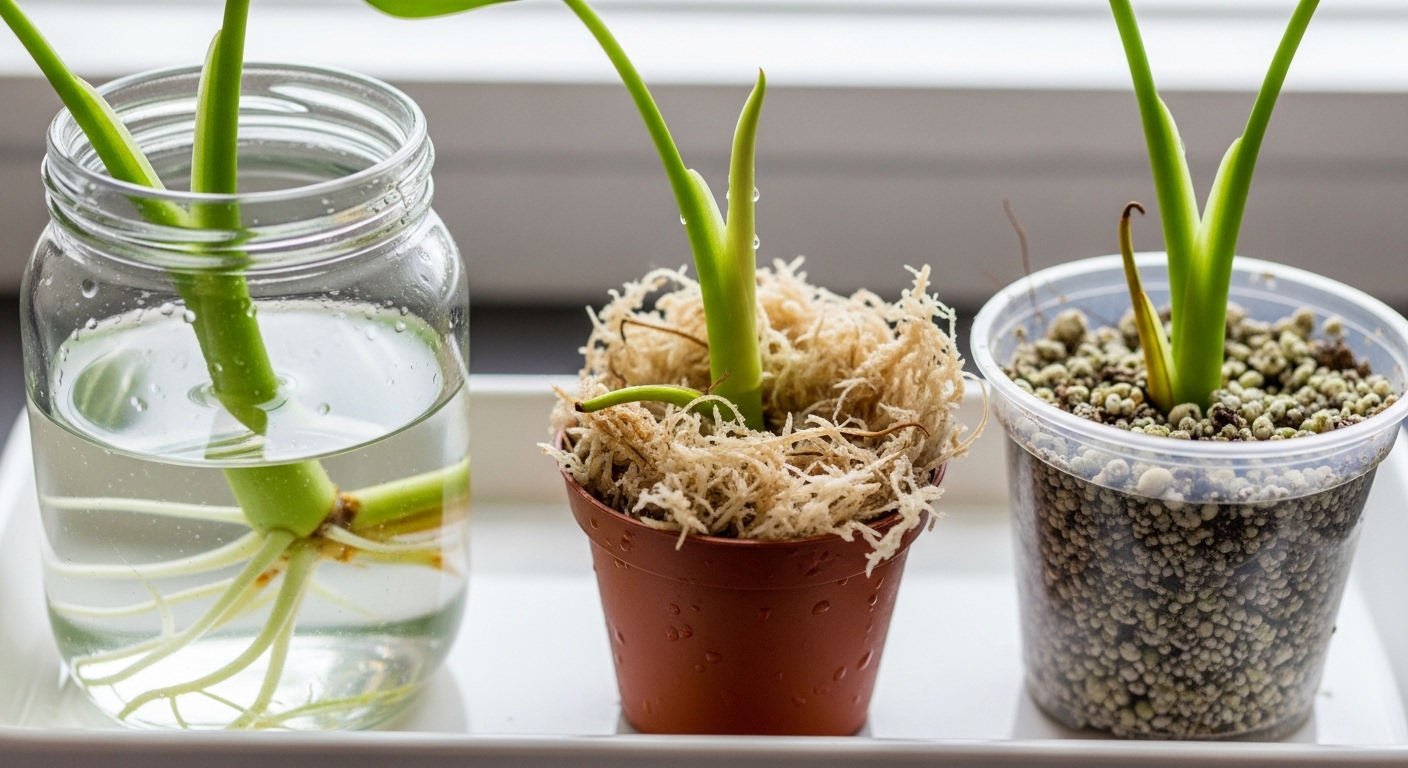
Each approach has genuine trade-offs. Water propagation lets you watch root development in real time, which is satisfying and useful for spotting problems early. Sphagnum moss tends to produce thicker, more branched roots that transition more smoothly into potting mix. A light soil mix works well too, though it offers less visibility into what's happening underground.
Many growers notice that cuttings rooted in water sometimes struggle slightly when moved to soil — the roots that form in water are structurally different from soil-adapted roots, and the plant has to essentially re-root itself. It's not a dealbreaker, but it's worth knowing. Sphagnum moss sits somewhere in between, producing roots that adapt more readily.
For most philodendron propagation, a node-tip cutting rooted in moist sphagnum moss tends to give the most consistent results — roots form reliably, and the transition to potting mix is generally smoother than with water-rooted cuttings.
Step-by-Step: Taking a Stem Cutting and Identifying Nodes
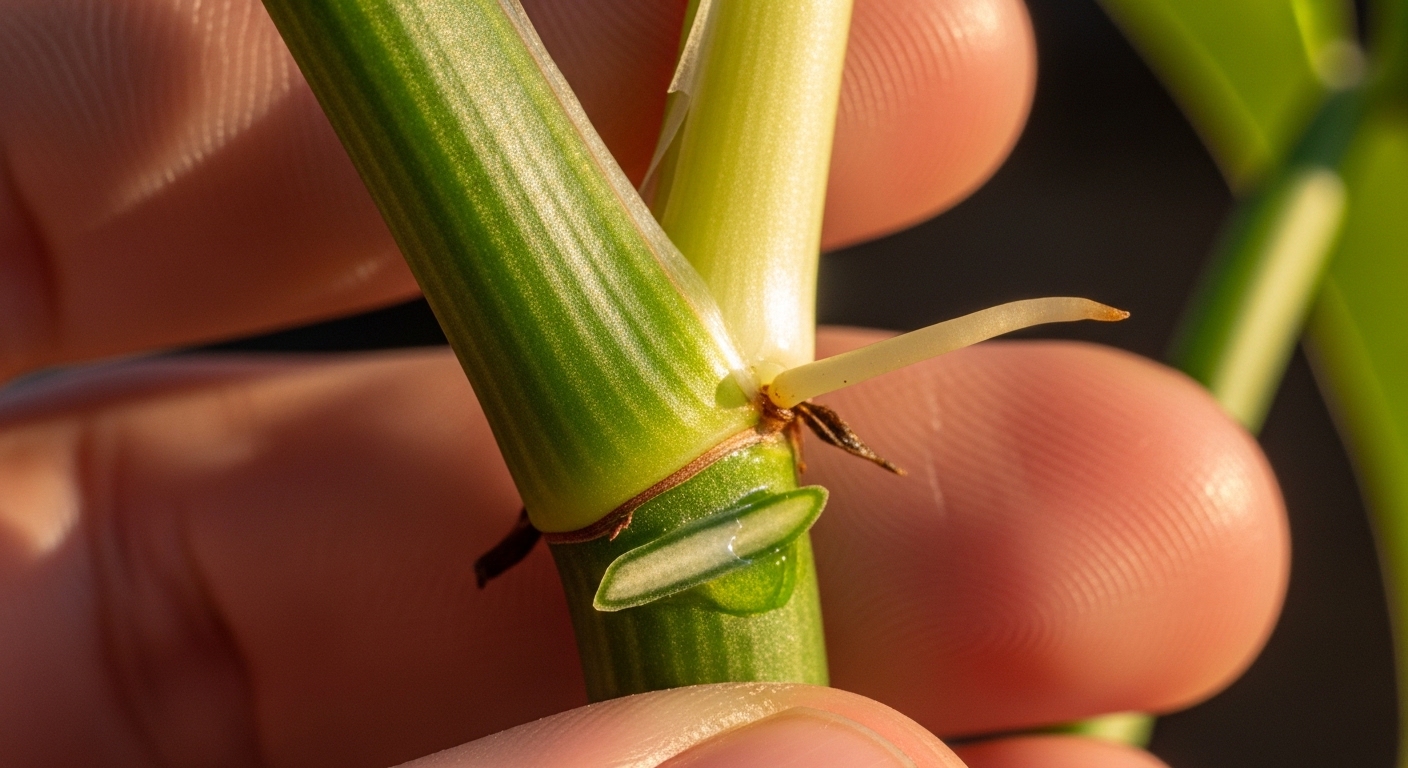
A successful philodendron cutting starts with finding the right node. The node is the point on the stem where a leaf attaches — you'll often see a small bump, a leaf scar, or a tiny aerial root nub at this spot. Without a node, a cutting cannot produce roots or new growth. This is the single most important thing to get right.
Here's how to take a clean, viable cutting:
- Select a healthy stem with at least one node and one or two leaves. Avoid stems that look yellowed, soft, or damaged.
- Cut just below a node using clean, sharp scissors or pruning shears. A cut 1–2 cm below the node gives the roots space to emerge.
- Remove any leaves that would sit below the waterline or be buried in moss — submerged leaves rot and can introduce bacteria.
- If the cutting has more than two or three leaves, remove the lower ones to reduce moisture loss while roots are establishing.
- Allow the cut end to air-dry for 15–30 minutes before placing it in your rooting medium. This helps the cut surface callus slightly and reduces rot risk.
For heartleaf philodendrons, a cutting with one node and one leaf is genuinely enough to produce a new plant. For split-leaf varieties (like Philodendron bipinnatifidum or the commonly sold 'Xanadu'), you'll want a slightly larger cutting with a more established stem section, as these grow more slowly from cuttings.
The first sign is often a small whitish nub appearing at the node within one to three weeks, depending on temperature and light. Don't be tempted to tug the cutting to check — disturbing early root growth is one of the most common ways to set the process back.
Step-by-Step: Rooting in Water vs. Sphagnum Moss
Once you have a clean cutting with a visible node, the rooting process itself is straightforward — the main variable is your chosen medium and how consistently you maintain it.
Water rooting:
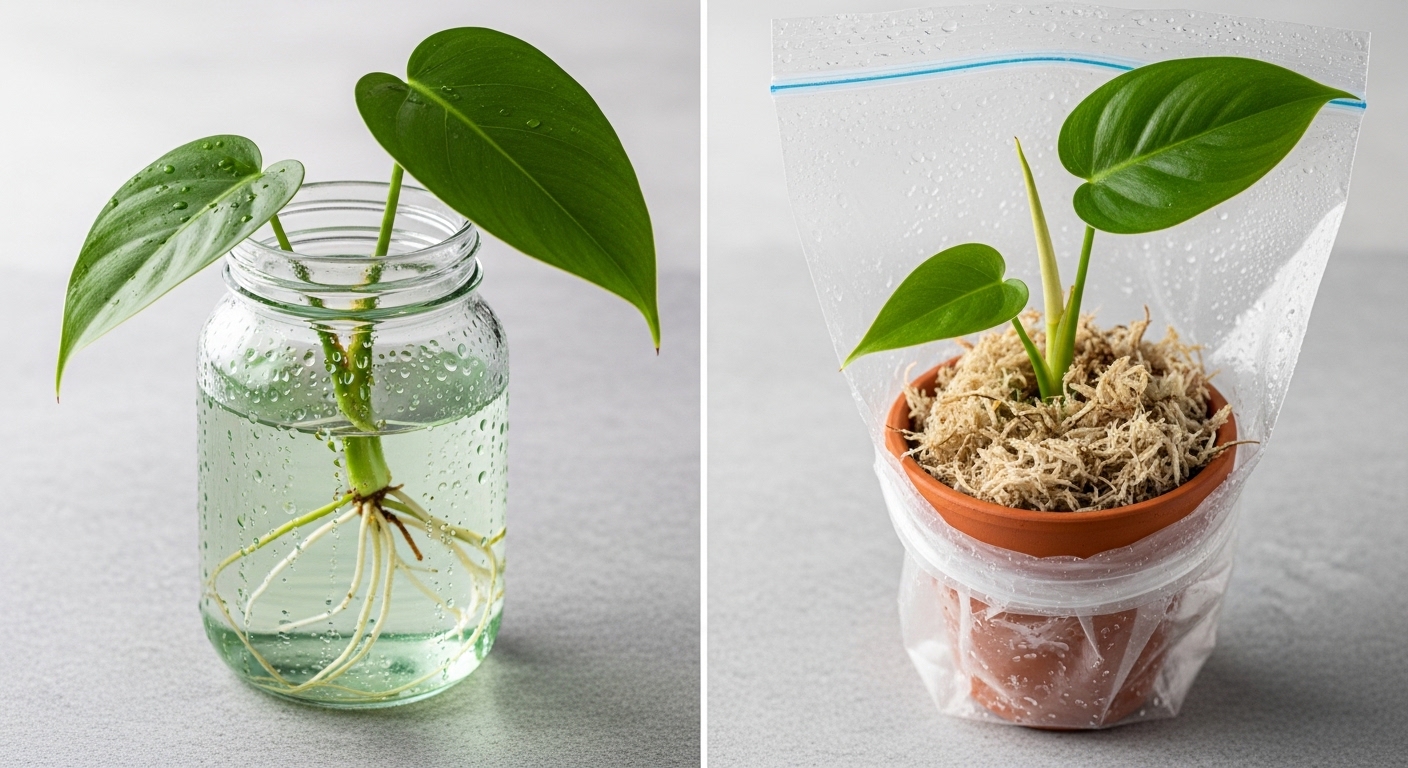
- Place the cutting in a clean glass or jar so the node is submerged but the leaves stay above the waterline.
- Use room-temperature water. Tap water is generally fine — if your tap water is heavily chlorinated, leaving it out overnight can help.
- Position the jar in bright indirect light. Direct sun can overheat the water and encourage algae growth.
- Change the water every five to seven days to keep it oxygenated and reduce bacterial buildup.
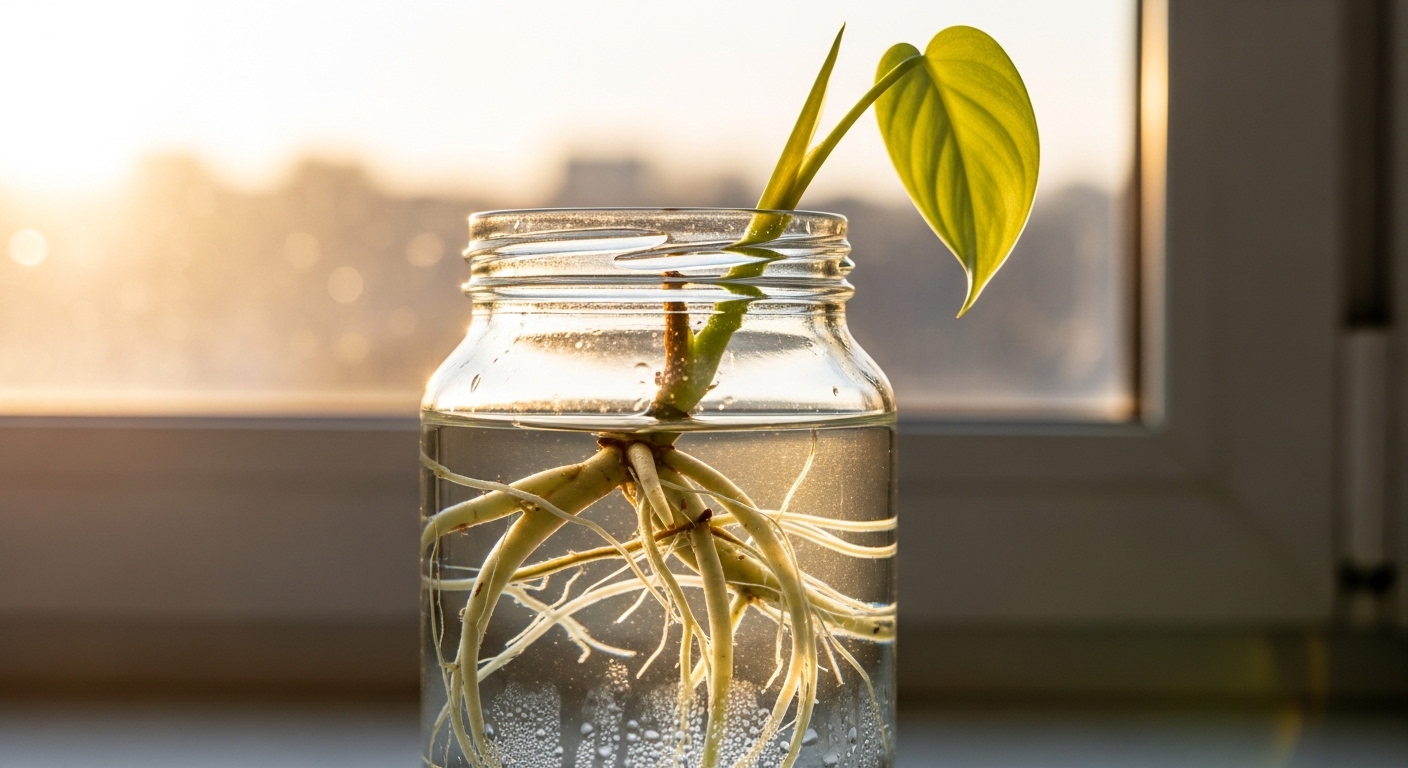
- Roots are typically visible within two to four weeks for heartleaf varieties. Wait until roots are at least 3–5 cm long before potting up.
Sphagnum moss rooting:
- Soak sphagnum moss in water, then squeeze out the excess until it's evenly moist but not dripping.
- Wrap the node section of the cutting in a small bundle of moss, or nestle the cutting into a pot loosely filled with moss.
- Keep the moss consistently moist — check every two to three days and mist lightly if the surface feels dry.
- Cover loosely with a clear plastic bag or humidity dome to maintain moisture, but allow some airflow to prevent rot.
- Roots generally form within two to five weeks. Gently tease the moss away to check progress without disturbing the roots.
Rooting Timeline and What to Expect
Philodendron cuttings generally root within two to six weeks under warm, bright conditions. Heartleaf varieties tend to move faster; larger-leafed or split-leaf types can take longer and may show little visible activity for the first few weeks before suddenly pushing roots.
Temperature has a significant effect. Cuttings kept in an environment between 20–27°C (68–80°F) root noticeably faster than those in cooler rooms. If your home runs cool in winter, placing cuttings on top of a refrigerator or near (not directly above) a heat source can help. A seedling heat mat set to a gentle temperature is another option many growers find useful.
What you'll typically observe, in rough sequence:
- Week 1–2: Little visible change. The cutting may droop slightly as it adjusts — this is normal.
- Week 2–3: Small white or cream-colored root nubs appear at or near the node.
- Week 3–5: Roots elongate and branch. In water, you can see this clearly; in moss, gently part the strands to check.
- Week 4–6+: Roots are long enough to pot up. New leaf growth may begin to emerge from the growing tip.
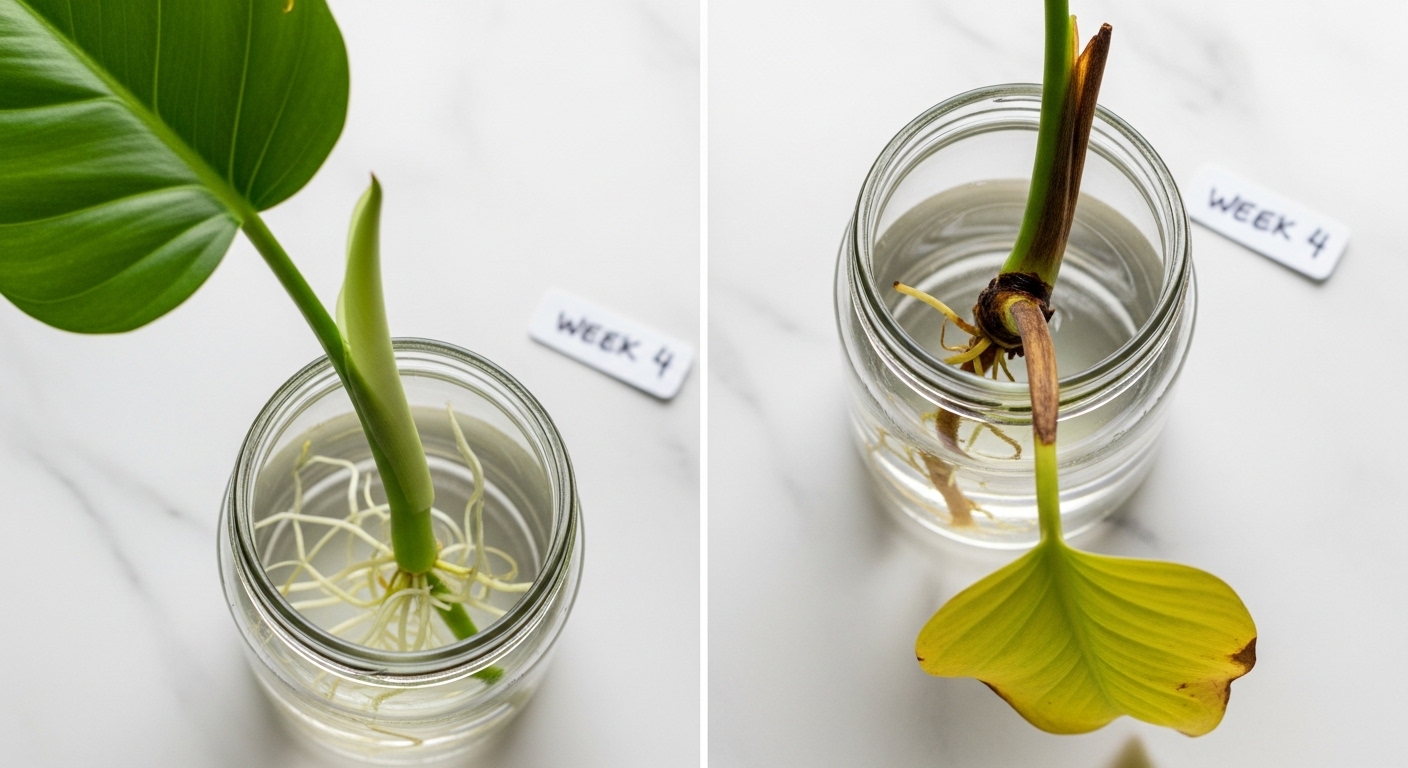
One frustrating part is that some cuttings simply stall. A cutting that looks healthy but shows no root development after five or six weeks may have been taken without a viable node, or may be sitting in conditions that are too cold or too dark. It's worth reassessing before assuming the cutting has failed.
Common Propagation Mistakes
Most propagation problems come down to a handful of recurring issues. Knowing what to watch for saves a lot of frustration.
- Cutting without a node. A stem section with only leaves and no node will not root. Always confirm you have at least one visible node before committing to a cutting.
- Overwatering the moss medium. Sphagnum moss should feel like a wrung-out sponge — moist but not waterlogged. Soggy moss leads to stem rot at the cut end, which is usually visible as a darkening or softening of the stem base.
- Changing water too infrequently. Stagnant water becomes oxygen-depleted and bacterial. Weekly water changes are a minimum; every five days is better in warm conditions.
- Too little light. Cuttings don't need intense light, but they do need bright indirect light to fuel the energy needed for root development. A dark corner will significantly slow the process.
- Potting up too early. Roots shorter than 2–3 cm are fragile and may not establish well in soil. Waiting until roots are at least 4–5 cm gives the cutting a much better start.
- Temperature too low. Below 18°C (65°F), root development slows considerably. Many growers find their winter propagation attempts take twice as long simply due to cooler ambient temperatures.
Potting Up Your New Plant
When roots are 4–6 cm long and showing some branching, your cutting is ready to move into soil. This transition is straightforward, but a few small details help the young plant settle in without setback.
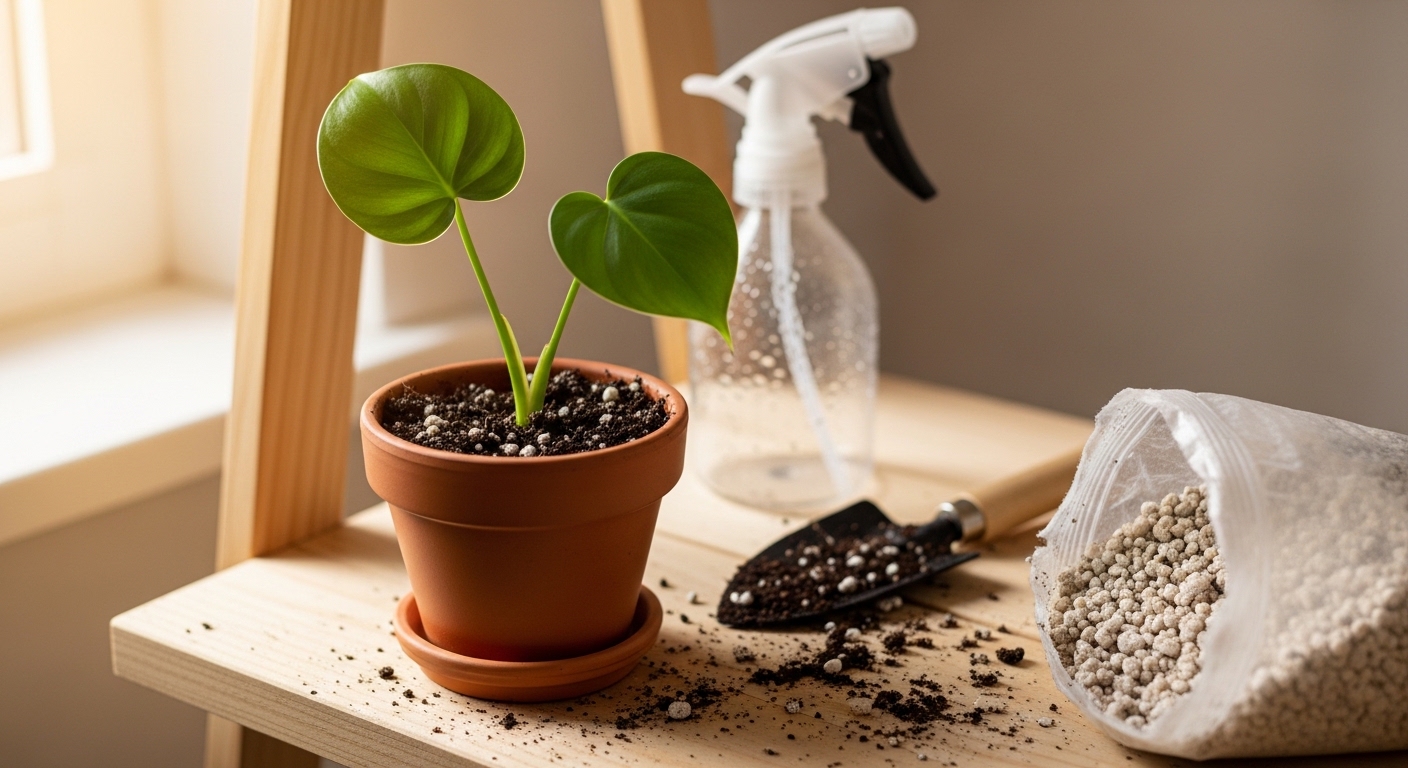
Choose a small pot — a 7–10 cm nursery pot is usually right for a single cutting. A pot that's too large holds excess moisture around the limited root system, which can lead to rot before the roots have a chance to expand. A well-draining mix of standard potting soil with added perlite (roughly a 3:1 ratio) works well for most philodendrons.
Steps for potting up:
- Fill the pot loosely with your prepared mix, leaving a small well in the center.
- If rooting in moss, gently remove the sphagnum — a little clinging to the roots is fine and won't cause harm.
- If rooting in water, allow the cutting to sit in a very light soil mix for a few days before moving to a richer mix, giving the roots time to adapt.
- Place the cutting in the well and gently firm the soil around the base. The node should be just at or slightly below the soil surface.
- Water lightly — enough to settle the soil but not saturate it. Wait until the top 2 cm of soil feels dry before watering again.
- Keep the newly potted cutting in bright indirect light and slightly higher humidity for the first two weeks. Avoid fertilizing for at least four to six weeks while the root system establishes.
It's common to see the cutting droop or pause growth for a week or two after potting — this is transplant adjustment, not failure. As long as the stem remains firm and the leaves don't turn yellow or mushy, the plant is likely settling in fine.
Philodendron propagation rewards patience more than technique. Get the node right, keep conditions warm and bright, and most cuttings will find their way. Once you've done it once, it becomes second nature — and you'll likely find yourself eyeing every long trailing stem as a future cutting.
If your new plant starts showing yellowing leaves or slow growth after potting up, it may be worth exploring common philodendron care issues around light and watering — those tend to be the next puzzle to solve once propagation goes well.


Comments
Post a Comment